Mark
Forum Replies Created
Viewing 3 posts - 1 through 3 (of 3 total)
-
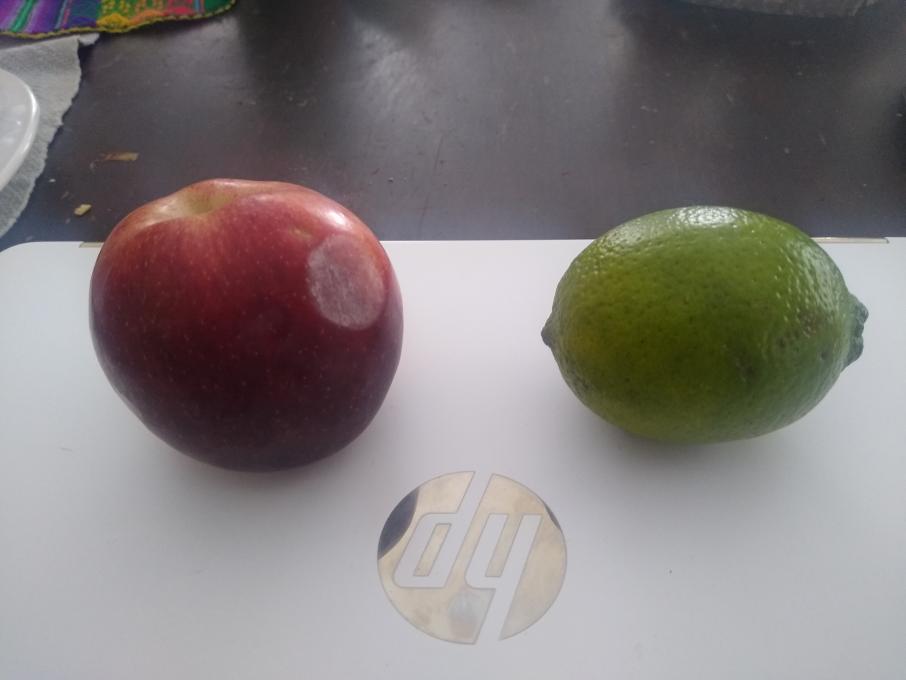
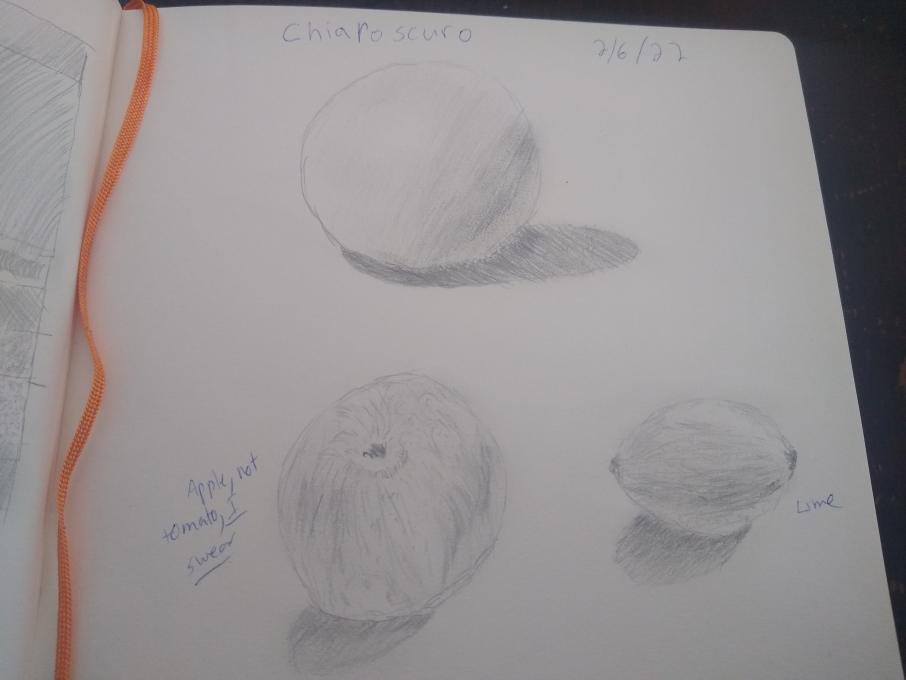
MarkParticipantI am starting to feel more comfortable, and I'm certainly starting to see where all the different techniques can be applied. For the chiaroscuro lesson, I started with an apple. It was tricky because (in addition to me being a beginner) the apple had a variety of light and dark colors independent of the amount and direction of light falling on it. My wife suggested a lime, and I think that came out better. With the apple, I used a lot of contour hatching to try to get the indentation where the stem was that then shifted to the overall round shape of the apple. I tried to use some scribbling for the area around the light part on the bottom left of the apple. With the lime, I started with contour hatching, didn't like it, and then switched to regular/straight hatching. I figured if it worked to show the roundness of the ball, it could work for the lime as well. I liked the overall effect. I did some scribbling at the ends to get the hard/dark parts. I also tried a few circles to get the dimples, but that didn't seem to work very well. I used blending to obscure these...somewhat. I liked using hatching for the shadow, blending it, then adding more hatching. The blending helped smooth out the value shift from the darkest to the lightest parts of the shadows, and it softened the shadows' edges.
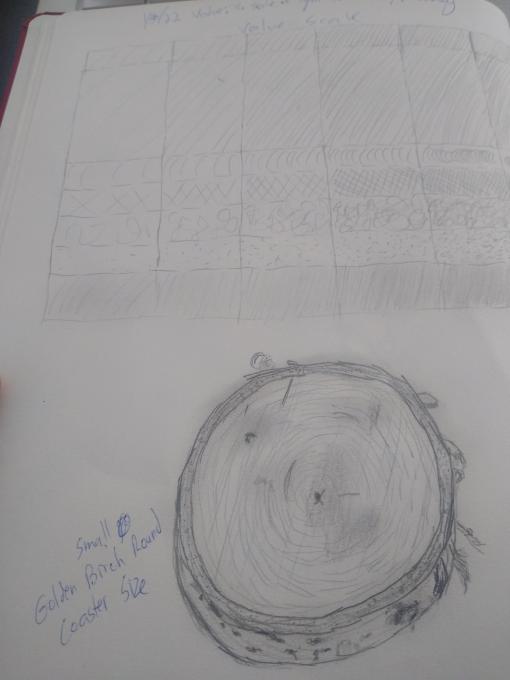
 For this birch round, I used a lot of contour hatching for the growth rings. I tried to overlay that with straight hatching to show the straight grooves left by the chainsaw. I used stippling for some holes I noticed in the outer dark layer of the wood. Scribbling seemed to work well to create the lenticels in the outer bark, and a little contour hatching helped with the curls of bark spiraling every-which-way around the edges. A little blending of denser hatching at the various dark spots on the surface seemed to help with the value difference in parts of the wood. I'm guessing these were formed by slight burning from the friction of the chainsaw when I cut the round.
in reply to: Illustrating the 3D World #865996
For this birch round, I used a lot of contour hatching for the growth rings. I tried to overlay that with straight hatching to show the straight grooves left by the chainsaw. I used stippling for some holes I noticed in the outer dark layer of the wood. Scribbling seemed to work well to create the lenticels in the outer bark, and a little contour hatching helped with the curls of bark spiraling every-which-way around the edges. A little blending of denser hatching at the various dark spots on the surface seemed to help with the value difference in parts of the wood. I'm guessing these were formed by slight burning from the friction of the chainsaw when I cut the round.
in reply to: Illustrating the 3D World #865996 -
MarkParticipant1. I was, at first, afraid...anxious. I wanted to do well, but I was afraid of creating something terrible here at the beginning. Patience came easily once I started drawing. Attention and forgetting time are natural to me. Getting the angles and attitudes correct was challenging. My warbler's head is still a bit too tall. Maybe more round than oval? Getting the forward-lean sleekness of the bird was difficult. 2. I definitely noticed new things like the moss at the base of the branch junction the bird is perched on. This and the bites out of many of the leaves (insect bites, I assume?) were things I didn't see until I attempted to draw them. Also, the knobbiness of the branch, the light and dark sides of individual leaves, the amount of black in the bird's tail feathers...all of these were details I didn't see in this picture until I attempted to draw the picture. For a difference this would make, I think this level of detail would help my ability to identify similar birds. Also, even more than simply identification, the appreciation of a bird's (or a branches) beauty grows with the attention I dedicate to it. I've noticed this with the birds that regularly return to my feeder. I never realized how formal and sleek chickadees were until I observed their tail feather patterns day by day. Similarly, the intensity of a red breasted nuthatch when it fights alone for its spot on the feeder formerly occupied by four chickadees than pauses curling it's body out to stare down any potential combatants.
I also included my 9-year-old son's drawing. He saw what I was doing and asked to sit and join me. I've wanted to get both my boys more into birding as I fall more in love with it, and this was a great step in that direction. For him:
1. It looked pretty hard, but everything was actually easier than I thought.
2. Probably the details on the leaves and how there were more than one in some places that I thought was just one big one. Now I know that some hard drawings you have to look at pictures and you could get pretty good at it.
in reply to: Jump Right in! #861115
-
MarkParticipantI started falling in love with birds and wanting to know them better at the beginning of the pandemic when I moved to teaching remotely. Seeing birds more and more, I sometimes try to take pictures, but I would like to have something more personal to focus where I want and write about what I see. I've always written poetry, but I've never drawn much. That's where this course comes in for me. My mother-in-law bought it for me as a Christmas gift, and I'm excited (though a bit nervous) to learn more about drawing and to incorporate this into my journal.in reply to: Style Your Journal Your Way #861098
 For this birch round, I used a lot of contour hatching for the growth rings. I tried to overlay that with straight hatching to show the straight grooves left by the chainsaw. I used stippling for some holes I noticed in the outer dark layer of the wood. Scribbling seemed to work well to create the lenticels in the outer bark, and a little contour hatching helped with the curls of bark spiraling every-which-way around the edges. A little blending of denser hatching at the various dark spots on the surface seemed to help with the value difference in parts of the wood. I'm guessing these were formed by slight burning from the friction of the chainsaw when I cut the round.
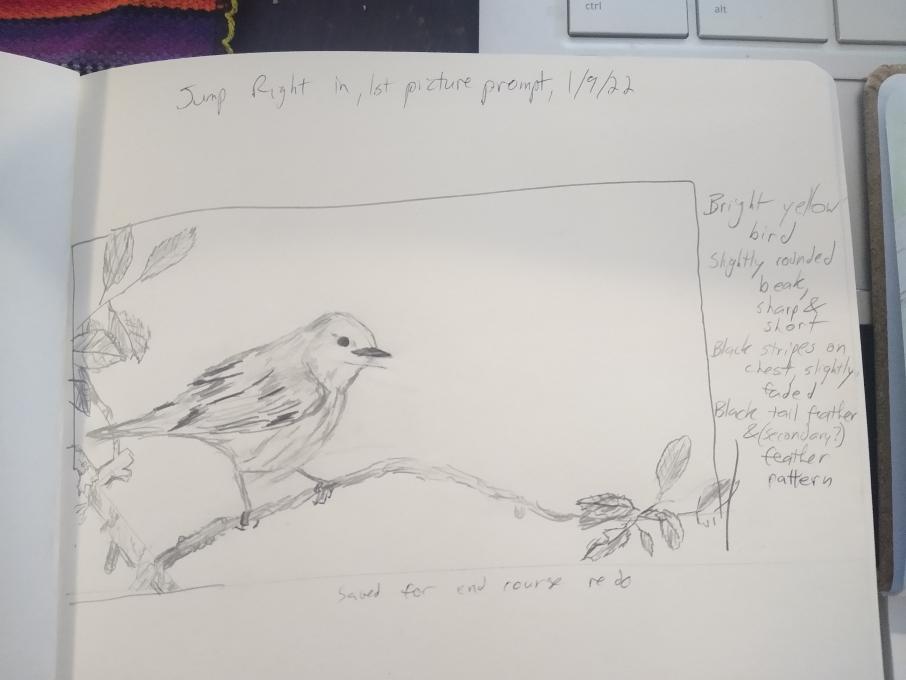 I also included my 9-year-old son's drawing. He saw what I was doing and asked to sit and join me. I've wanted to get both my boys more into birding as I fall more in love with it, and this was a great step in that direction. For him:
1. It looked pretty hard, but everything was actually easier than I thought.
2. Probably the details on the leaves and how there were more than one in some places that I thought was just one big one. Now I know that some hard drawings you have to look at pictures and you could get pretty good at it.
I also included my 9-year-old son's drawing. He saw what I was doing and asked to sit and join me. I've wanted to get both my boys more into birding as I fall more in love with it, and this was a great step in that direction. For him:
1. It looked pretty hard, but everything was actually easier than I thought.
2. Probably the details on the leaves and how there were more than one in some places that I thought was just one big one. Now I know that some hard drawings you have to look at pictures and you could get pretty good at it.

Viewing 3 posts - 1 through 3 (of 3 total)