The Cornell Lab Bird Academy › Discussion Groups › Nature Journaling and Field Sketching › Getting Comfortable with Watercolor
-

-
-
Tip for those using pencil with watercolor (so mostly everyone) try using kneaded erasers, the help keep the occasional smear at bay. it also helps fade the pencil to make your art look neater.
I never knew their was different techniques for water color! I'm definitely no pro with water colors so this course is helping a lot! -
-
-
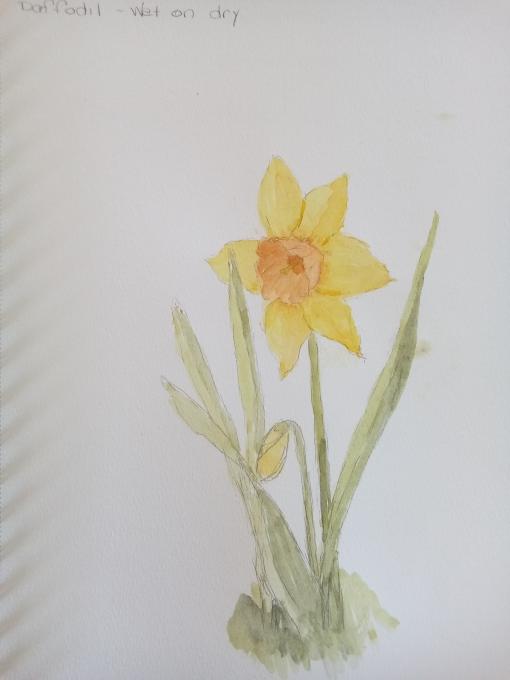
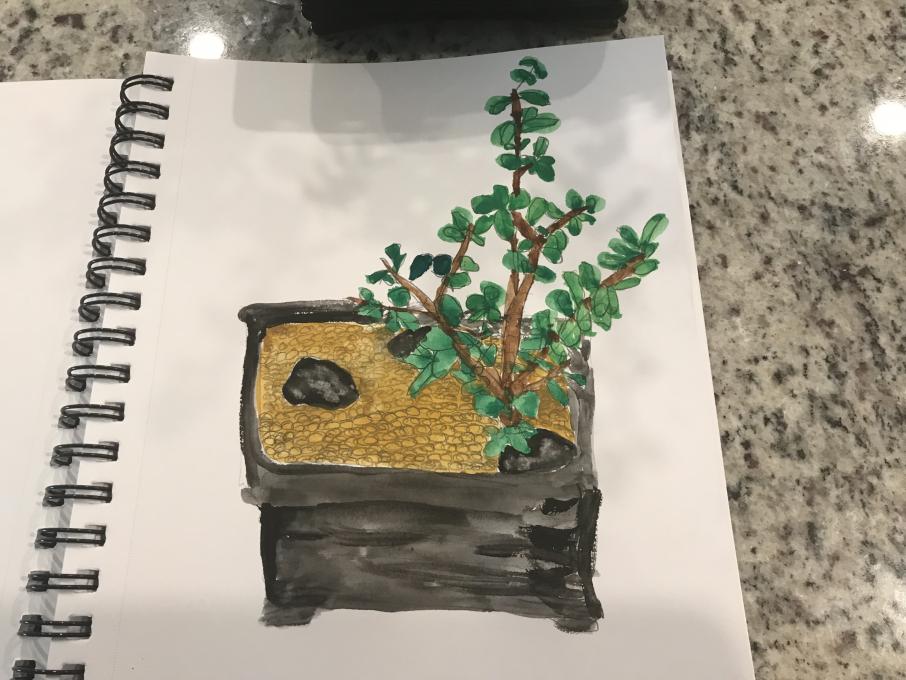
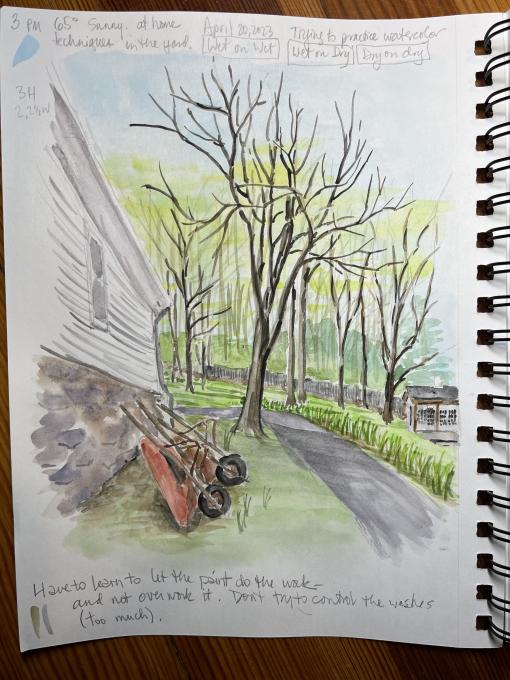
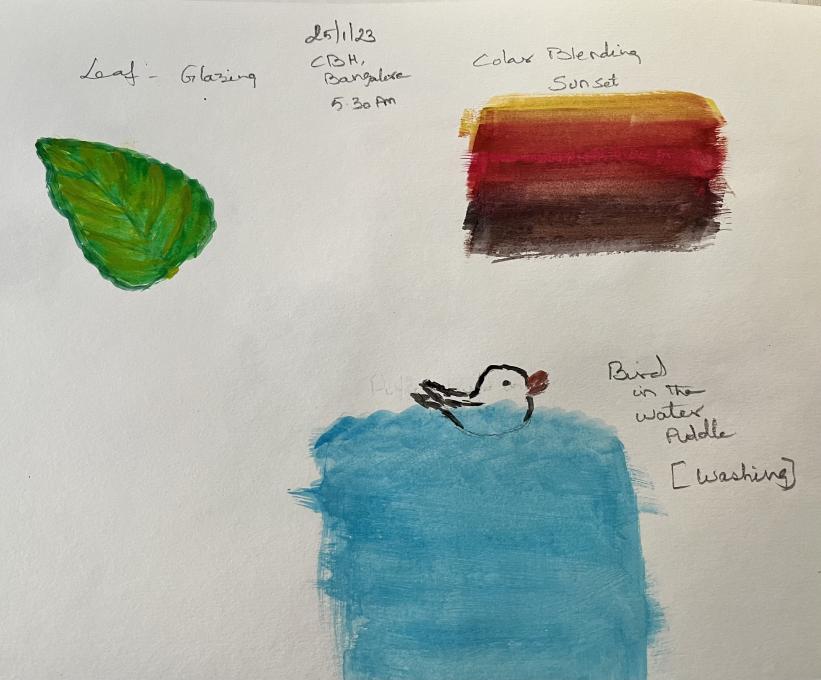
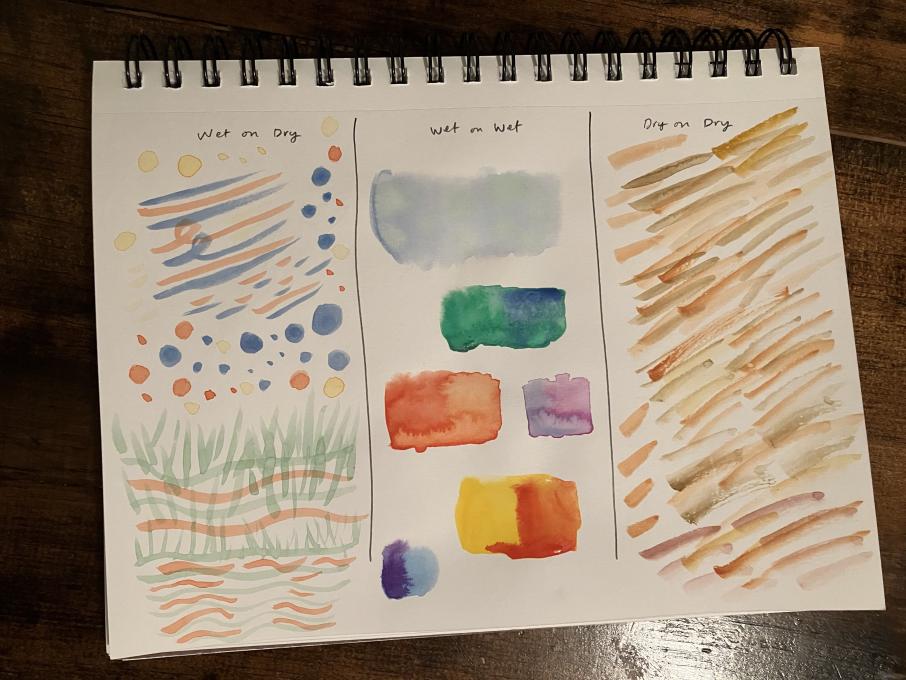
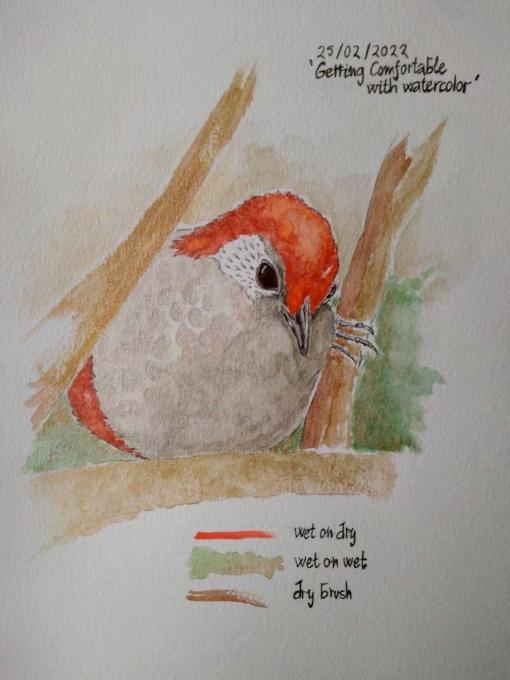
I think I tend to try to draw with watercolors, rather than paint - if that makes sense. The wet on dry technique works great for that. Wet on wet was fun, but I have to learn to let the paint go, and not try to control it so much. The dry on dry seemed good for suggesting texture in an area.
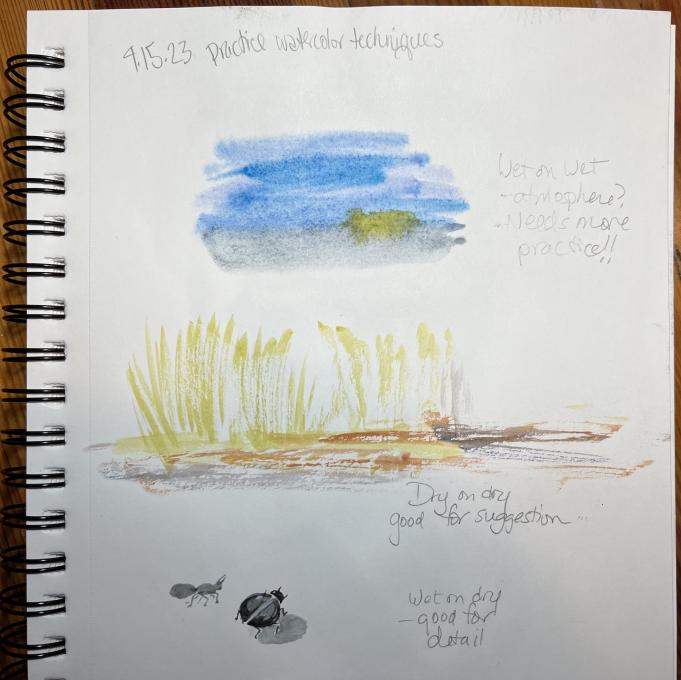
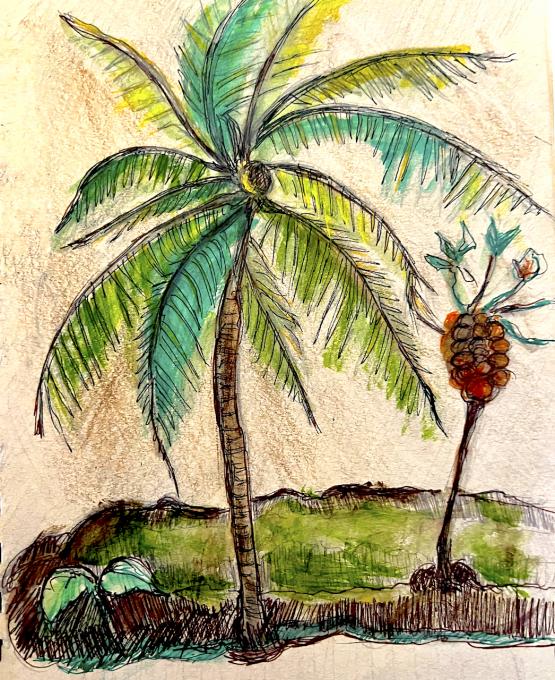
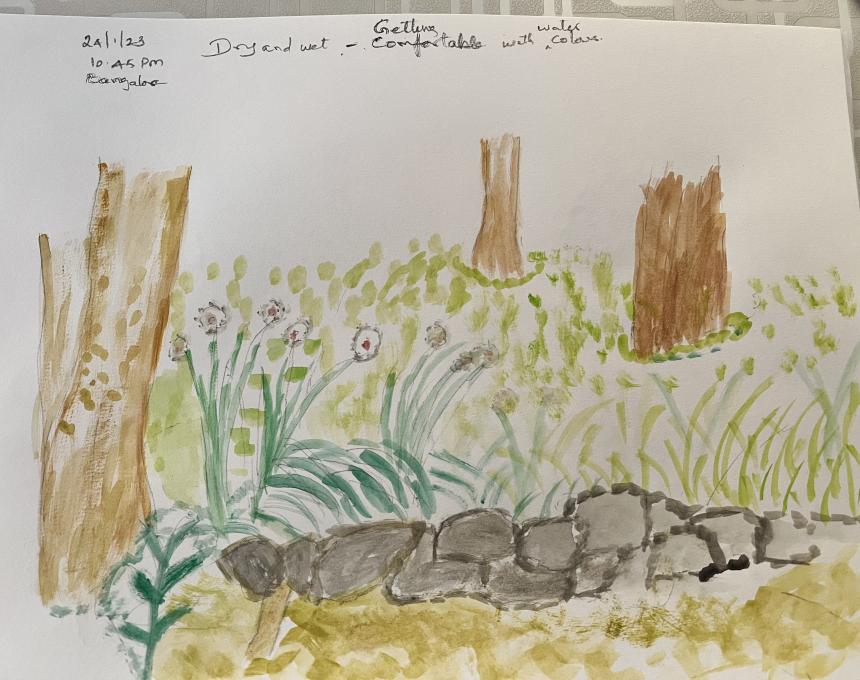
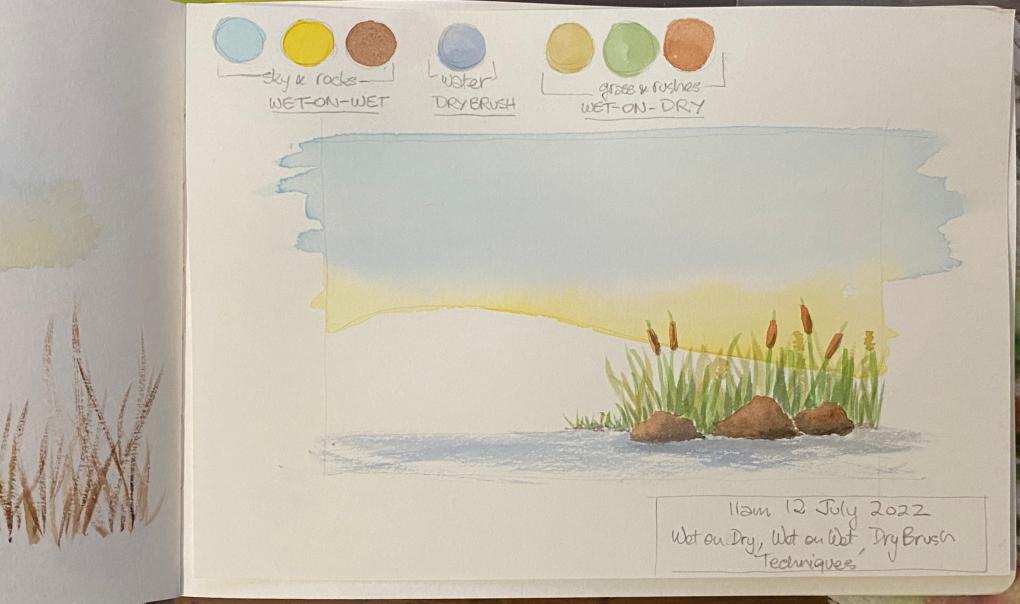
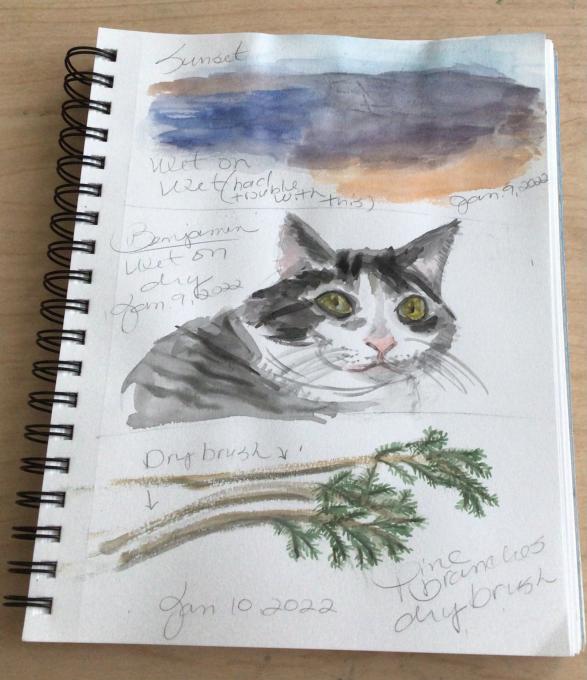
Below I attempted to capture the colors of an early spring day in Connecticut. The wet on wet worked well for suggesting the light foliage and sky, and wet on dry defined most of the shapes in my landscape. I wasn't able to achieve dry on dry with the water brush.
-
-
-
I tried them all. Wet on wet will take alot of practice! Mine was too wet and I also noticed it buckled the paper then the color tends to pool up at least on mixed media. I am going to use colored pencils in the journal, mixing and testing colors is too much work for my journal but still will practice with the watercolors for general artwork.
-
Though was using the Wet on dry method for a long time, was not applying in the nature journaling concept. It's quite interesting. But I am not sure how fast and effectively I can bring in the color palette in my journal while I am on the field. I think I need more practice.
-
-
I've done all of these techniques at other times except the dry brush. Wet on dry is what I do for most of my watercolour paintings, and I love wet on wet for sunsets, sunrises, in fact any sky works beautifully for this method. I need lots of practice with dry brush but once I am better at it I think it'll be perfect for delicate texturing like fur, hair, leaves, pine needles, feathers, etc. I will be using that a lot!
-
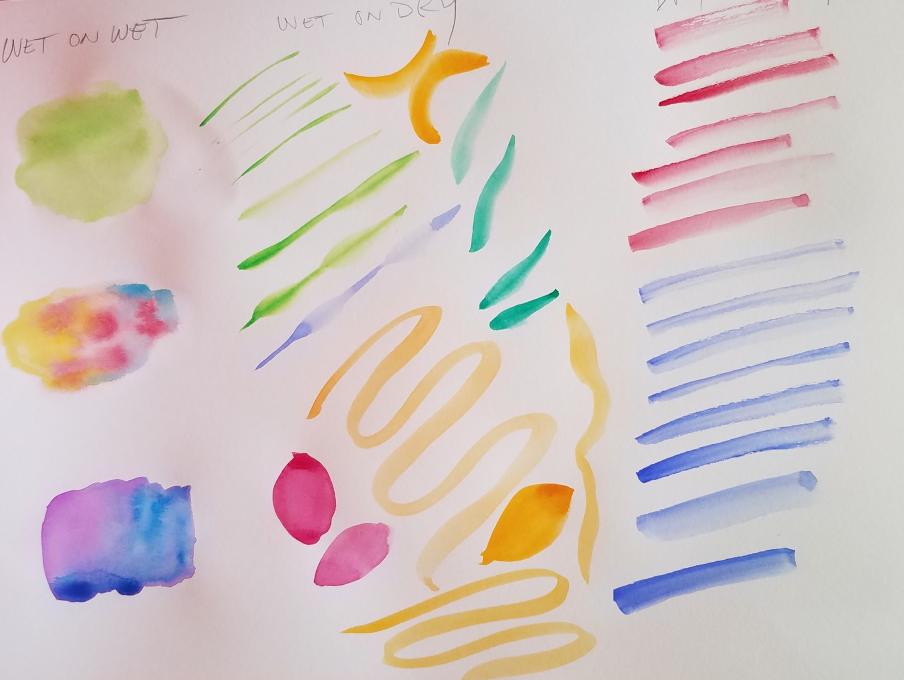
1. Tried all 3. Had several goes with each. Wet on Wet shouldn't be too wet or all the pigment is gone. Also gravity pleas an impact on what happens on the page. 2. Wet-on-dry great for water. Wet-on-Wet great for sky.
-
That is really cool, I like how you created a template on the technique
-
-
I’m glad we were able to see various techniques, before now I was a student of as wet as possible and the pages would become wrinkled and warped as well as the pulp would begin moving on the paper. I’m glad I was able to try these techniques out as I can see how I would use them in the field to achieve various styles without distorting and ruining my sketches.
-
hi, I have a question if I use window and newton will I get the same watercolor effects in my paintings as Liz?
-
Hi Nanette, I don't know for sure but I am also using Windsor and Newton and I love the way they are working. Hope that helps.
-
-
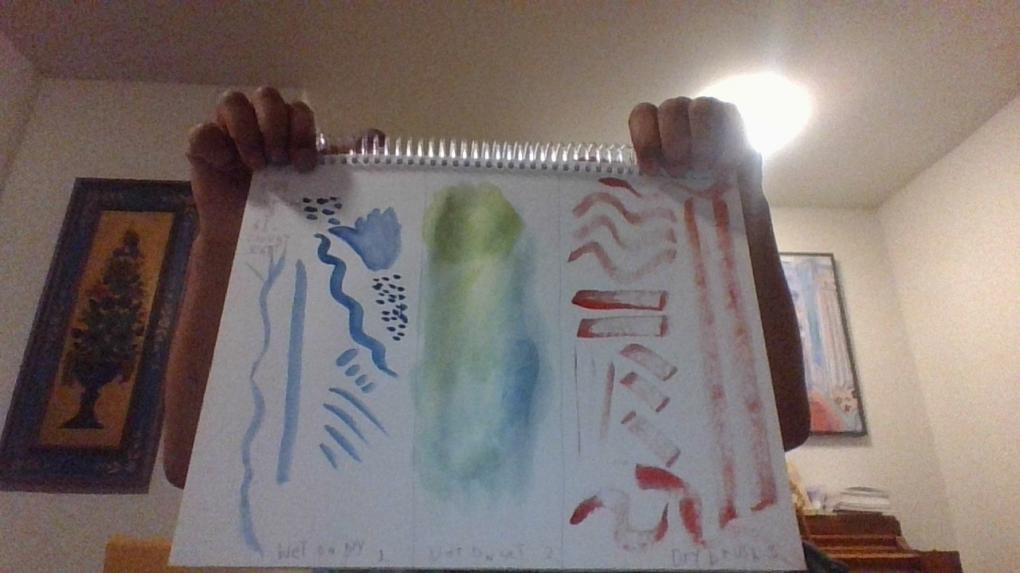
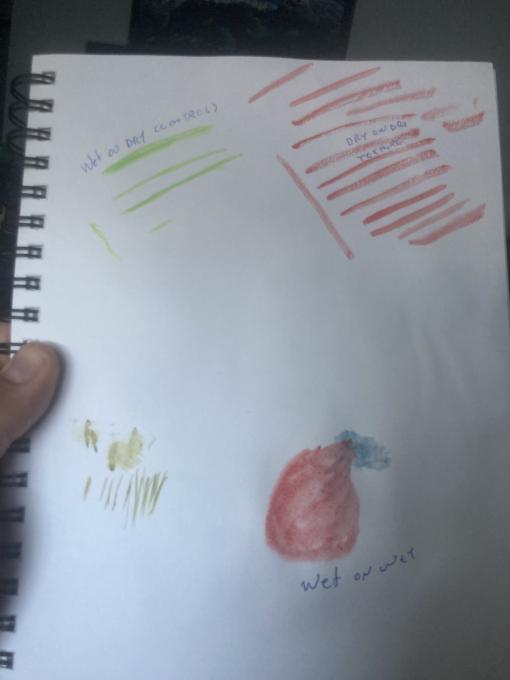
"Dry on dry","wet on dry" and then "wet on wet".I used the sketchbook to do these experiments but the wet on wet caused the 50lb paper to buckle so I would not do this in my sketch book/journal unless it was a very small area. 140 lb watercolor paper( block) is made for that so I would probably not use that technique in a journal because the drawings or blank paper underneath would be affected.Dry on dry would be good for grasses,fur, feathers. Wet on dry would be applicable for most color studies.
-
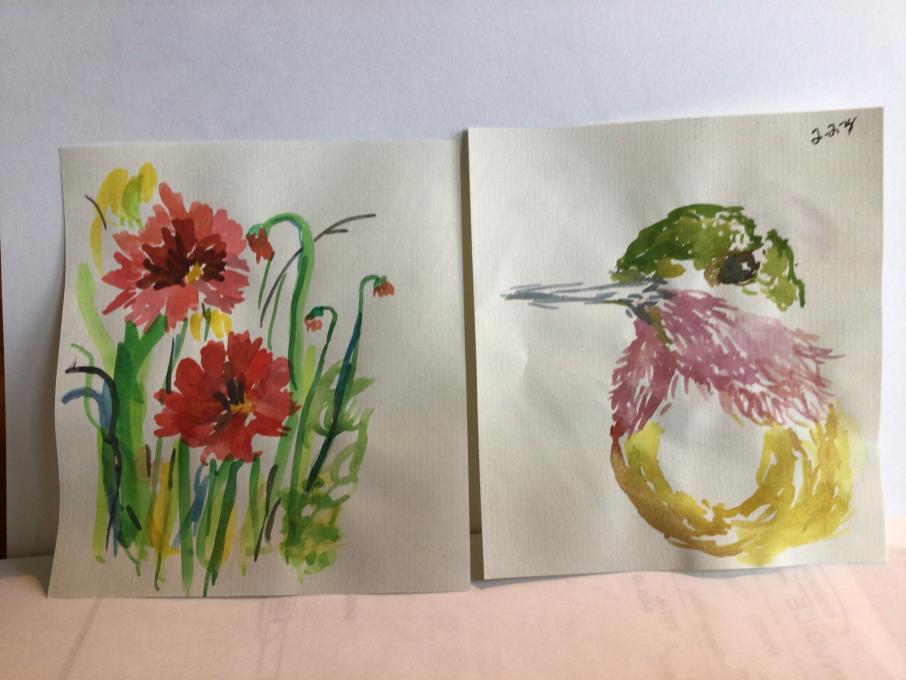
1) I tried all three of the mentioned techniques on quick sketches of the two photos we were given in the previous topic.
I used the wet on wet for the clouds in the landscape and for the underpainting of the bird. The dry brush I used for the trees in the landscape and for the white of the feathers. 2) I usually don't use wet on wet of dry brush but this exercise has shown me where they can be applied to great effect. I will definitely be using more of them in my journaling projects.
* I also managed to use a wash for the bird background, blending for the feathers and some glazing in the mountains of the landscape.-
nice work! Natalija.
-
-
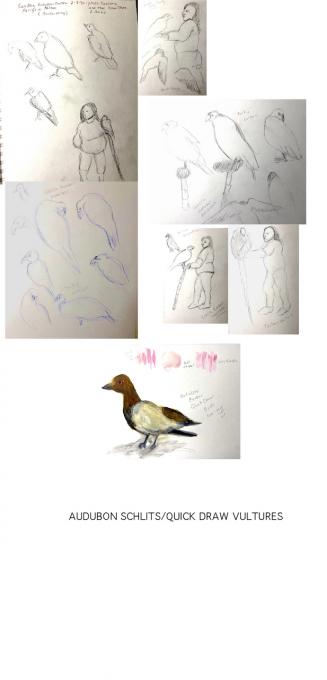
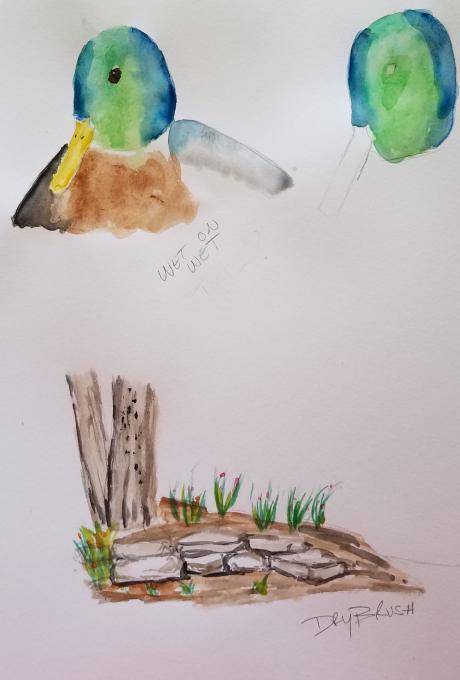
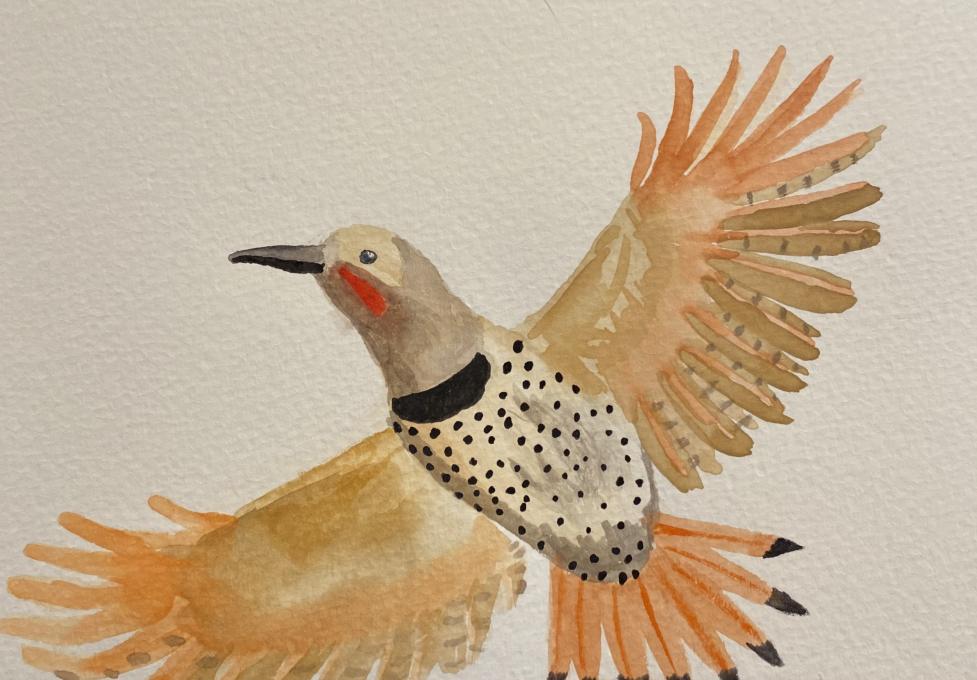
Wet on Dry: Northern Flicker
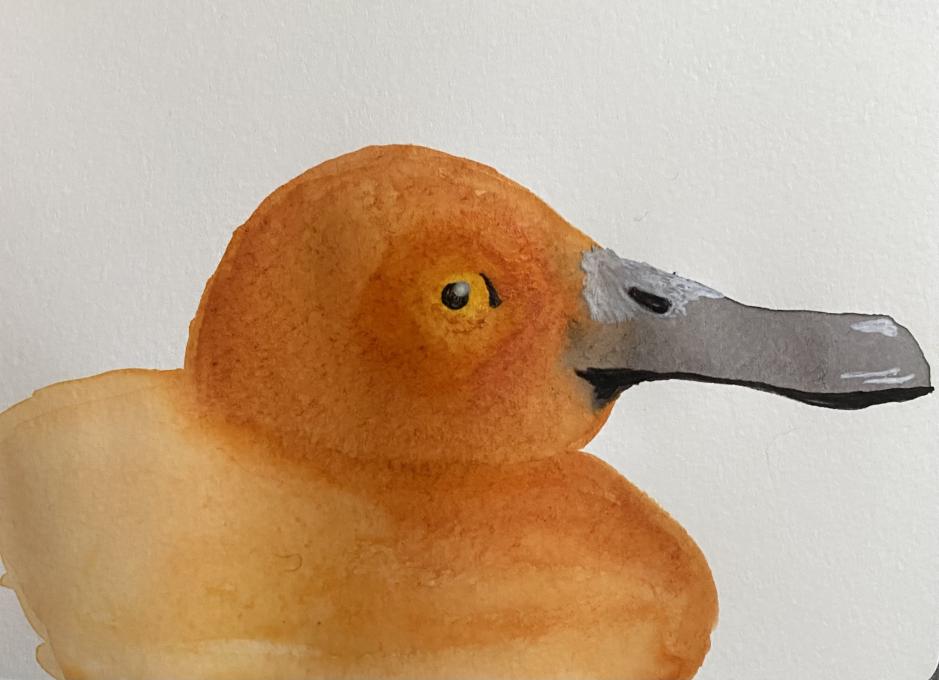
Wet on Wet: Cinnamon Teal
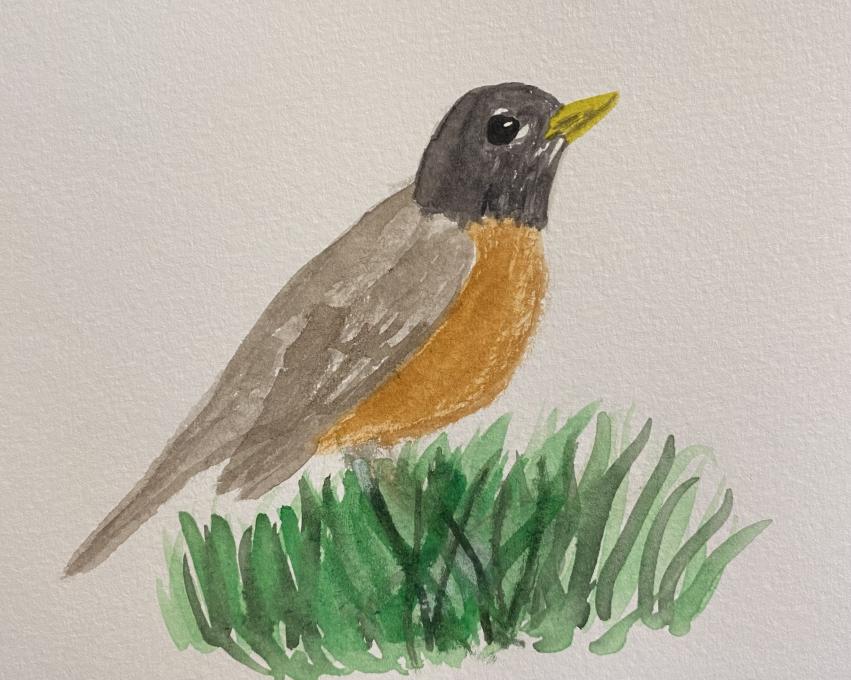
Dry Brush: American Robin
Out of the three techniques my favorite is Wet on Dry (the one I typically use) and my least favorite is Dry Brush. I will continue using wet on dry in future journaling projects, but might throw in wet on wet from time to time.-
Beautiful! I like the simple expressiveness in these.
-
-
-
-
-
I tried all three techniques in these paintings. I have the most difficulty with the wet on wet. I want to control the paint too muchand then I go over the wet area with more paint and water. Before I know it I am lifting the paper.
-
I tried each of the three techniques in the pages above. I really liked using the wet on dry for getting in the fine details on the snowy owl. I also loved using wet on wet to get a pretty good representation of the sunset. Still struggle with dry brush a bit for texture as it is difficult to control. I actually used a dry natural sponge to try to get the texture of the lichens. Closer-- but still not quite there....-
I really like how the dry natural sponge added texture.
-
-
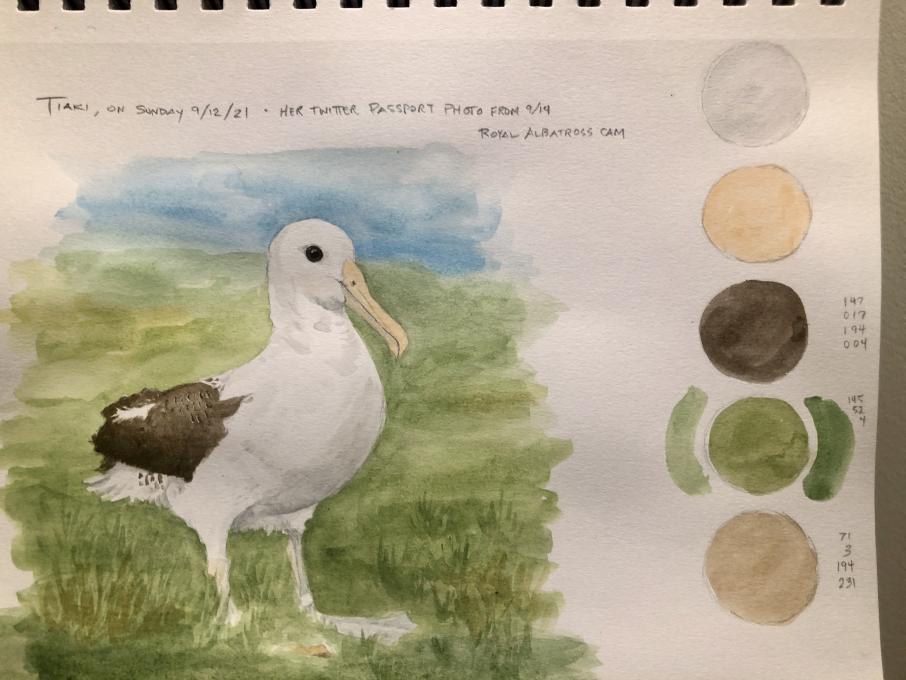
Two of the three techniques are used here. The color intensity on the other students' paintings below is inspiring. Going with lighter values forced me to paint multiple layers which looks overworked. The sky was painted twice and most of the grass three times! I miss Tiaki on the Royal Albatross Cam but am having fun painting her!
-
This is gorgeous! I love watching the live animal webcams too. Love your shading and shadows in the white. You are obviously an experienced artist and know how to use value intensity very effectively.
-
-
I tried 3 of them. Wet on dry is definitely my favorite. Also, it's a bit hard for me to use the water brush. I was very frustrated and my hand was getting tired squeezing the water. I ended up getting two jars and I painted happily.
 I’m glad we were able to see various techniques, before now I was a student of as wet as possible and the pages would become wrinkled and warped as well as the pulp would begin moving on the paper. I’m glad I was able to try these techniques out as I can see how I would use them in the field to achieve various styles without distorting and ruining my sketches.
 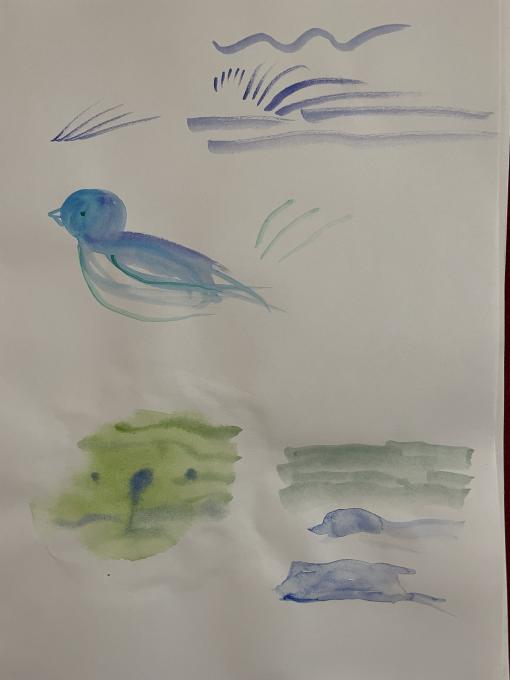 "Dry on dry","wet on dry" and then "wet on wet".I used the sketchbook to do these experiments but the wet on wet caused the 50lb paper to buckle so I would not do this in my sketch book/journal unless it was a very small area. 140 lb watercolor paper( block) is made for that so I would probably not use that technique in a journal because the drawings or blank paper underneath would be affected.Dry on dry would be good for grasses,fur, feathers. Wet on dry would be applicable for most color studies.
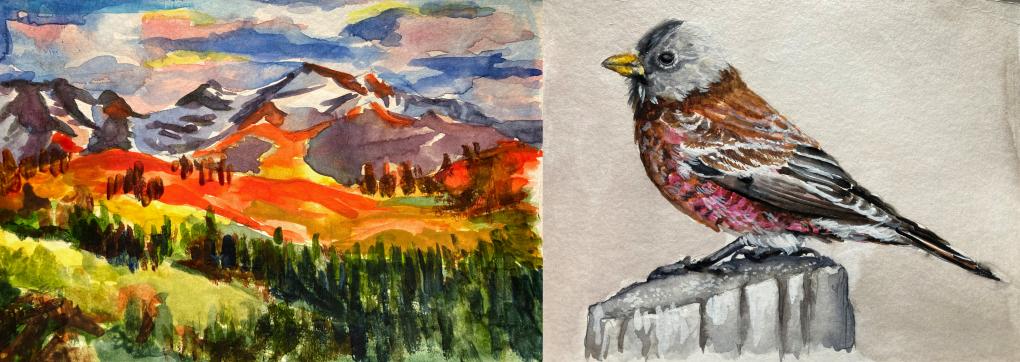


 and then I go over the wet area with more paint and water. Before I know it I am lifting the paper.
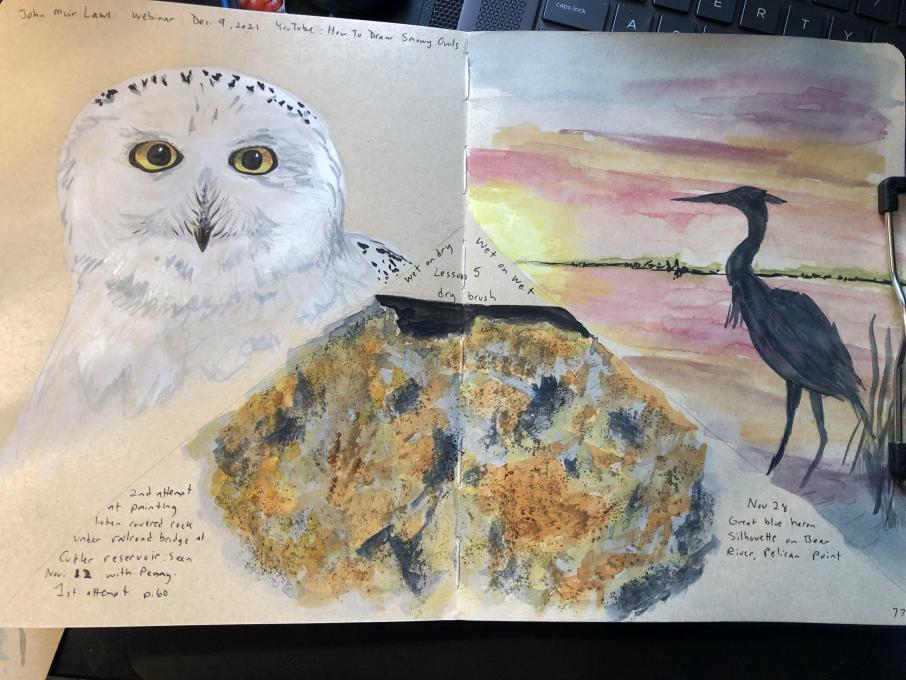
Read More: