The Cornell Lab Bird Academy › Discussion Groups › Nature Journaling and Field Sketching › Illustrating the 3D World
-
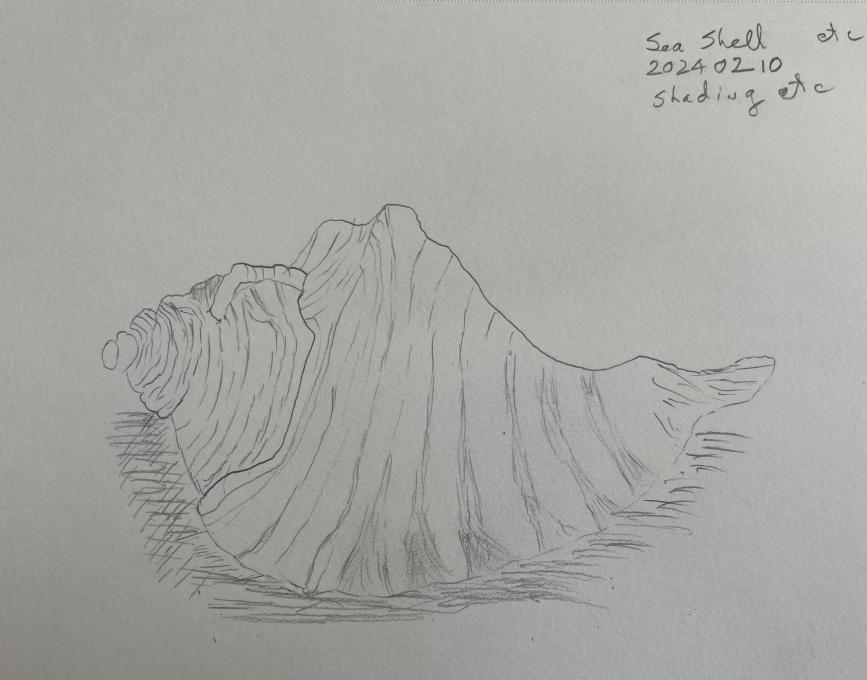
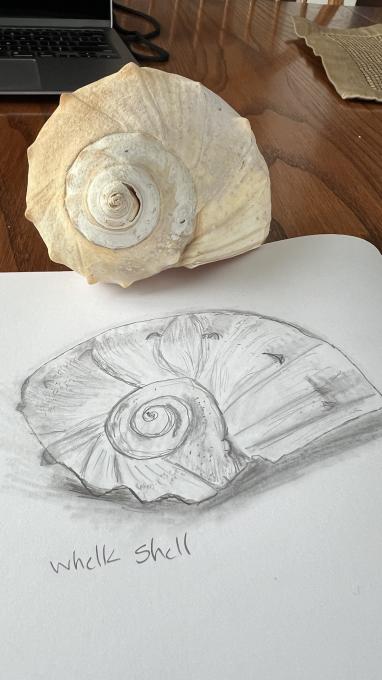
Using shading on a fairly light colored object threw me off a bit but I am reasonably happy with the result here with the mostly whitish seashell.
 This quick detail of the Christmas cactus seems a bit sparse without color, but is OK for starters.
I cheated a bit on these other images as they were drawn from imagination rather than from 'life' ... but I am happy with the outcome.
This quick detail of the Christmas cactus seems a bit sparse without color, but is OK for starters.
I cheated a bit on these other images as they were drawn from imagination rather than from 'life' ... but I am happy with the outcome. -
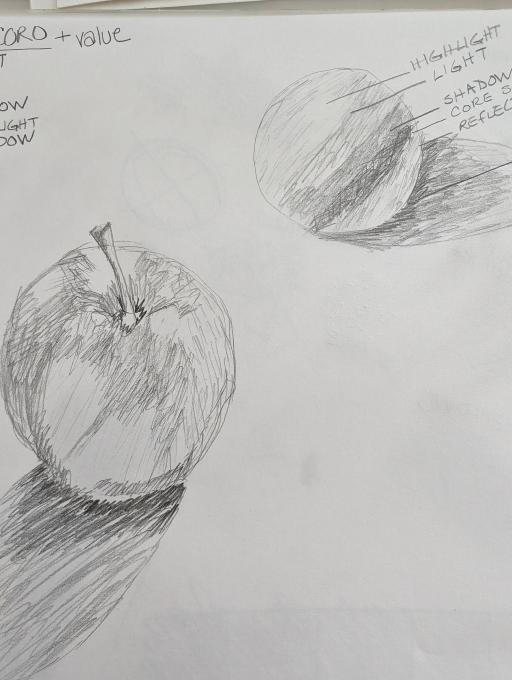
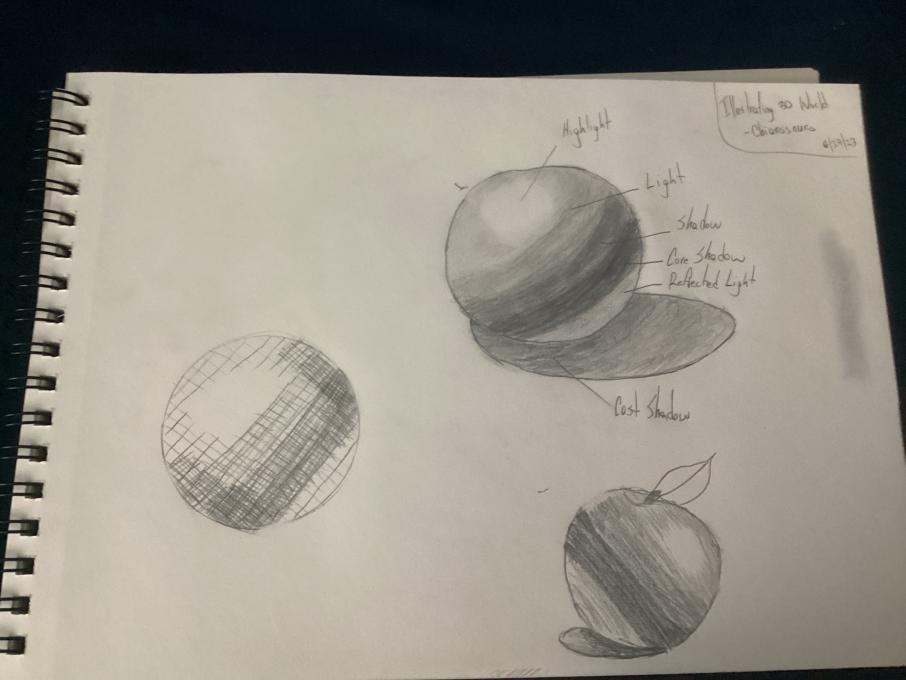
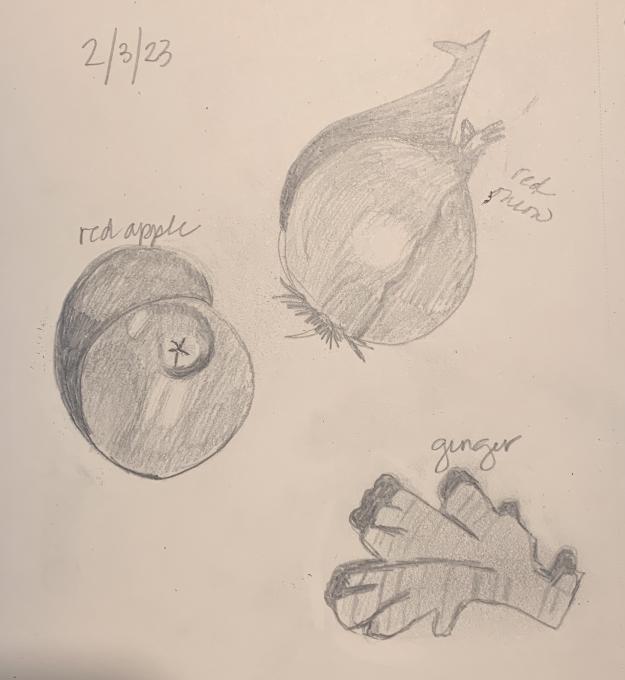
I was pretty happy I could even draw the apple (bottom left). I can see how practice will make this much better. Squinting really helped me see the light in dark when it wasn't obvious. It also made me see I had two light sources; one large window to the right and a smaller reflective light from smaller window on the left. I need to practice with lightest shading, I seem to have a heavy hand.
-
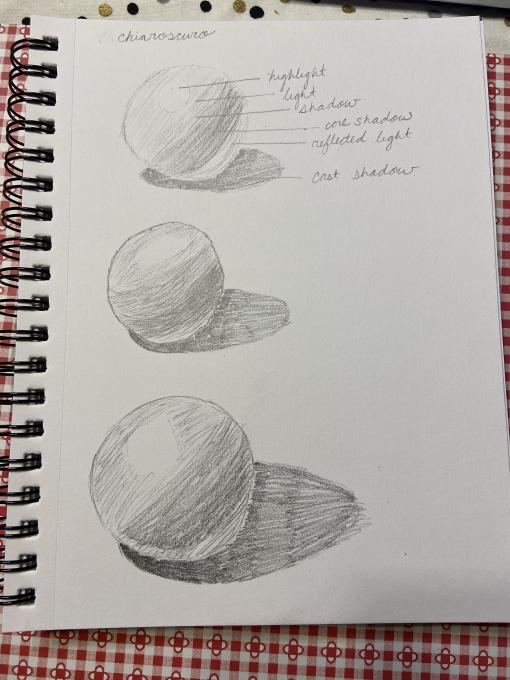
Chiaroscuro was eye opening! A great skill to learn. The shell was difficult, though, to show both the highlight on the top left side and also the protruding eye in the center. Looking forward to applying more new techniques.
-
I am glad I tried it!
-
I need practice!
-
I'm feeling a bit more comfortable with each new drawing. I need to work on quite a bit. Dimension; light; finding the curves and shape of the object. But it's coming.
-
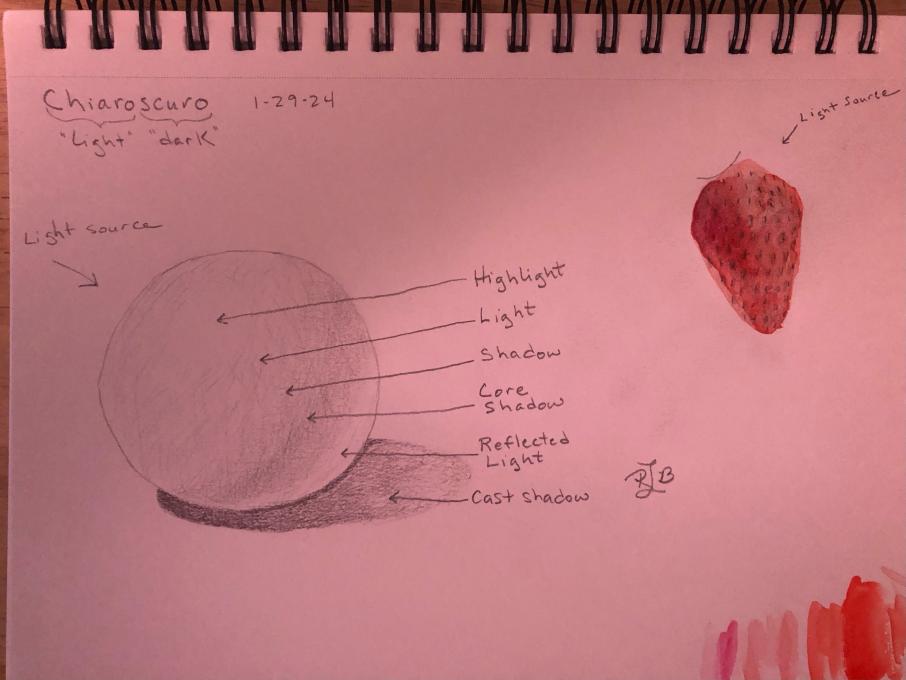
Always good to revisit the basics of light and shadow! I have always struggled with making shapes look like shapes. What helped me the most here was my husband teaching me about the terminator line. That is the point on the object past which the original light source does not shine. It will be the darkest line on the object, and the gradient of shadows behind it will be all darker than the darkest shadow on the lit side.
-
This was a helpful comment. Thank you.
-
-
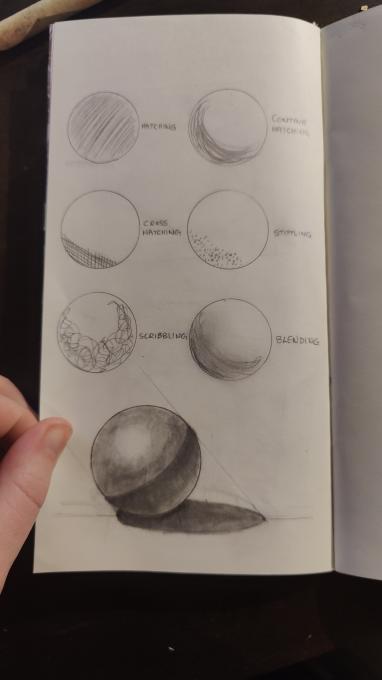
I am fairly new to sketching and drawing and would like to know more about various methods of filling in subjects(ie. use of crosshatching or tippling). These are new things that I don't know about and would like to see this included in the course material.
-
I like to think about the direction the light is coming from which helps a lot. I also think using your finger to blend really makes it look better.
-
This was a really challenging but enjoyable lesson. I've never considered how to approach the different shades of light within an object. I still plan on practicing this skill before moving on. As others have shared, it's difficult to capture texture without it clouding the shadows. I look forward to continuing to learn and practice this skill.
-
I appreciate the reminder to know where the light is coming from and go from there. I am nervous when I start with the shadows that I will creep too much darkness into the light areas and it is hard to work backwards and lighten things up.
-
-
Persimmon with varying light source.
-
I am a newbie, so this is my first time trying this technique. I plan to try this technique a few more times before moving on.
-
One of my favorite drawing techniques was blending. Drawing with 3D isn't exactly new, but its exciting to refresh skills.
-
-
Looking at 6 different methods of shading has, I feel helped with understanding how to draw objects and render them to look more three-dimensional. Still, though, this technique could use more work and I will continue to practice with it. When I lok at items I have drawn, attempting to pay attention to chiaroscuro, shading, and other methods to make it look three dimensional, I see just a flat image that's darker in some areas than others, I need to continue working to fully show these objects as they are.
-
Learning about chiaroscuro helped me place the light and dark areas on my paper more precisely, but I definitely need more practice.
-
Was fun looking for the various parts of the chiaroscuro. I was curious that my mango had another band of shadow below the reflected light - I think it might have been reflected off the darkest cast shadow? I was glad for the freedom to experiment with the different types of marks - sometimes the hatching was enough, but I found myself cross-hatching and scribbling too. I appreciate others' comments on the difficulty of finding the chiaroscuro in a highly textured object!
-
I did not care for my former attempts at creating three d. I am blaming it on the 10.5 inches of snow. I went to the Audubon center that is near and sketched the bear. Hope this is better.
-
-
I remember this being hard in my high school art classes, and it certainly hasn't gotten any easier. I feel like it got a little easier with each attempt, although I certainly have a long way to go! I also want to work on my light, sketchy marks -- my tendency is to go too heavy and dark right away.
-
-
-
I like the looseness of this rendering. It makes me want to give scribbling another look!
-
-
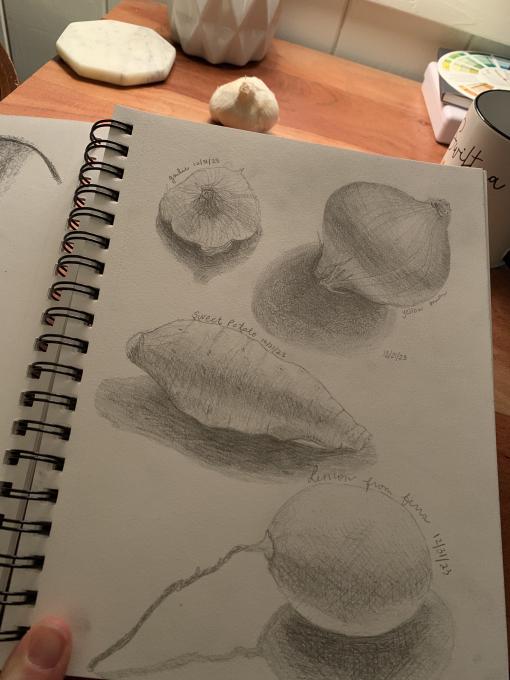
Very fun...but not very realistic...not a chicken! it is an onion!! ha...I loved learning about Chiaroscuro. I love that kind of information because it helps me to better understand what I'm seeing.
 This quick detail of the Christmas cactus seems a bit sparse without color, but is OK for starters.
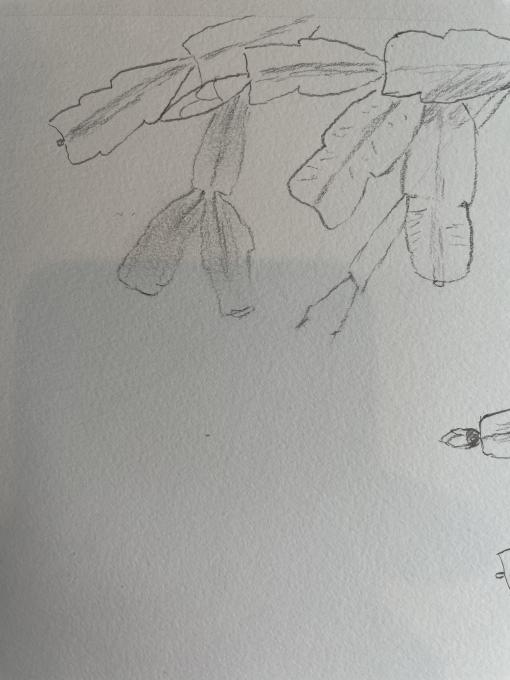 I cheated a bit on these other images as they were drawn from imagination rather than from 'life' ... but I am happy with the outcome.
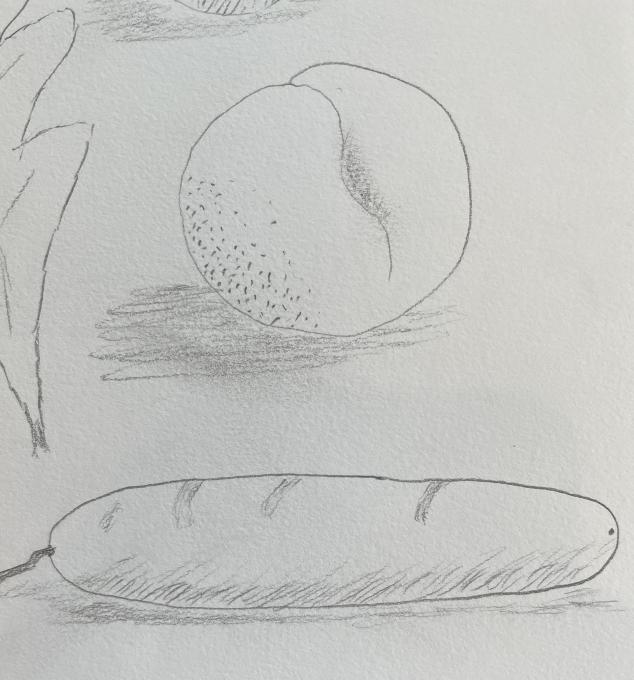
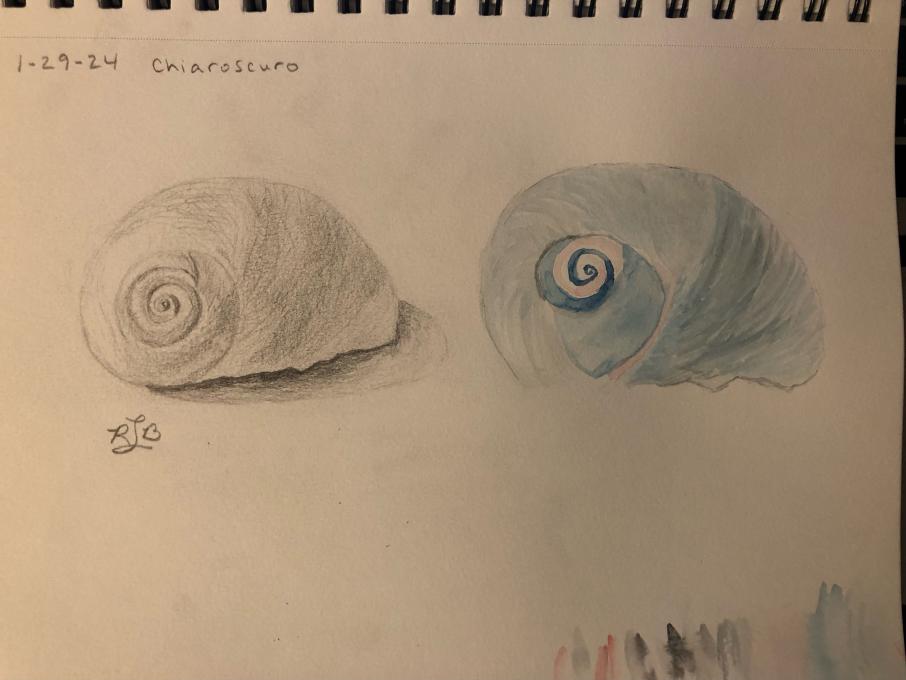 Chiaroscuro was eye opening! A great skill to learn. The shell was difficult, though, to show both the highlight on the top left side and also the protruding eye in the center. Looking forward to applying more new techniques.
  I am glad I tried it!
 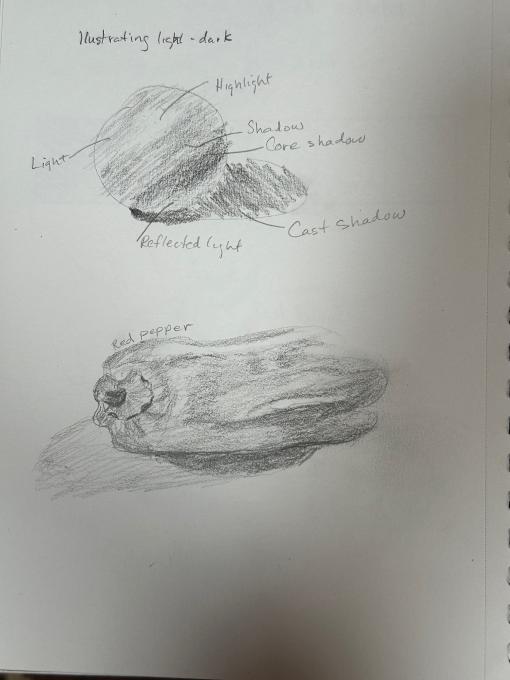 I need practice!
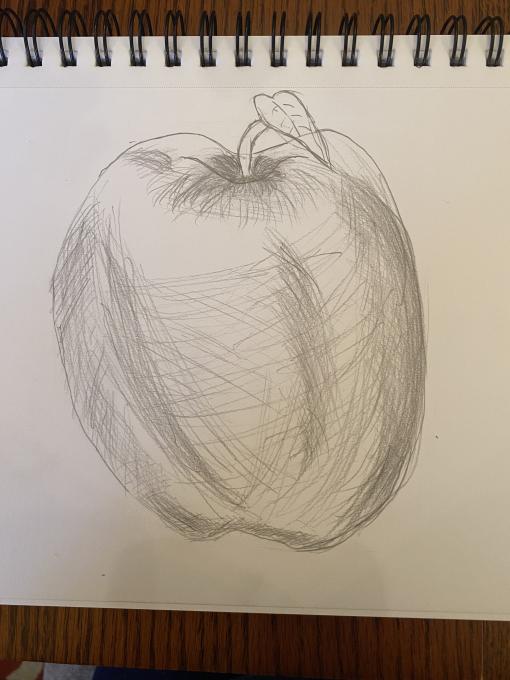
 This was a really challenging but enjoyable lesson. I've never considered how to approach the different shades of light within an object. I still plan on practicing this skill before moving on. As others have shared, it's difficult to capture texture without it clouding the shadows. I look forward to continuing to learn and practice this skill.
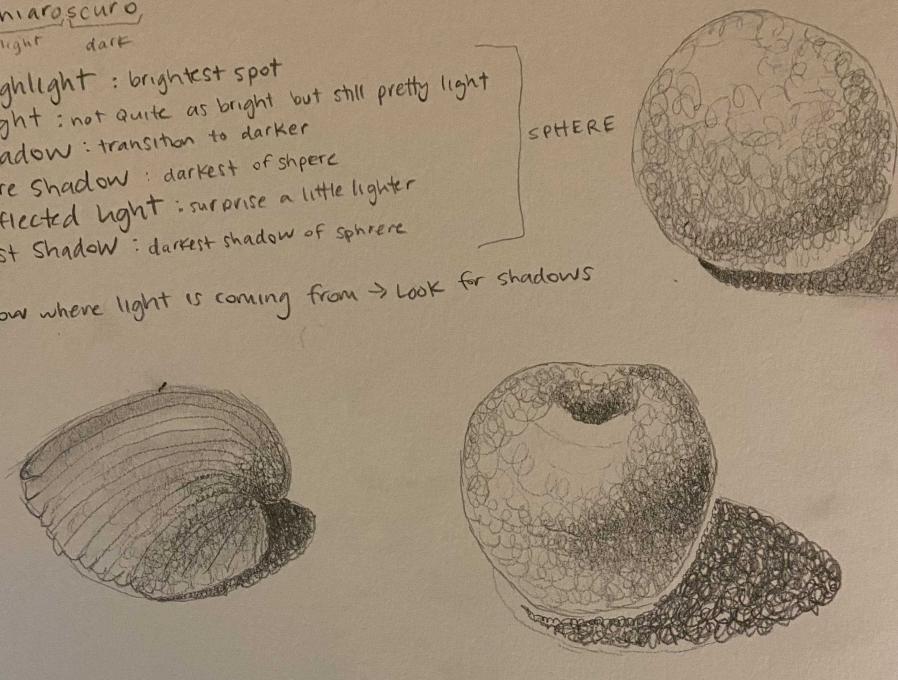

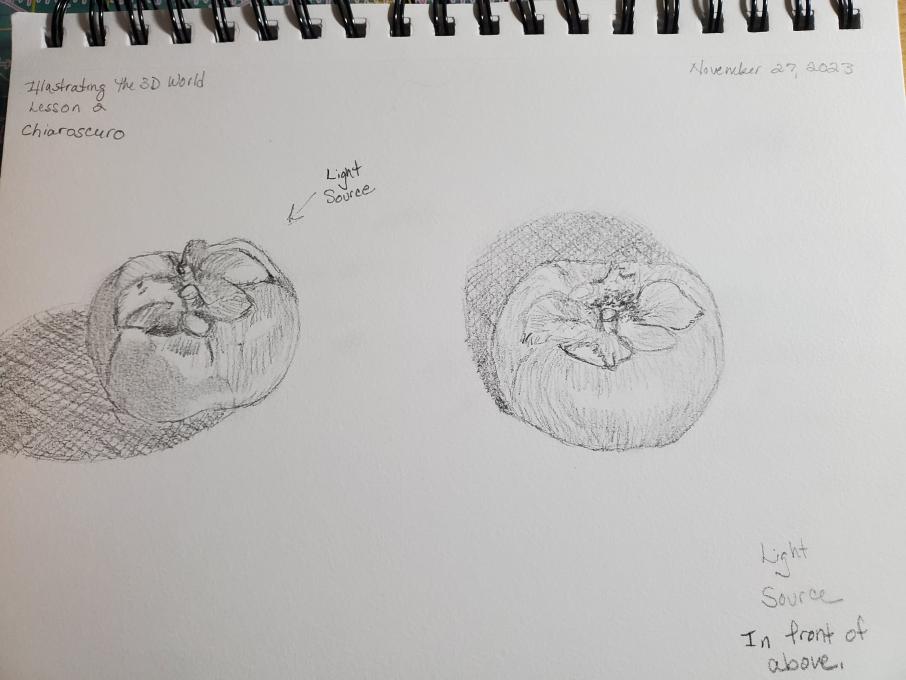 Persimmon with varying light source.
 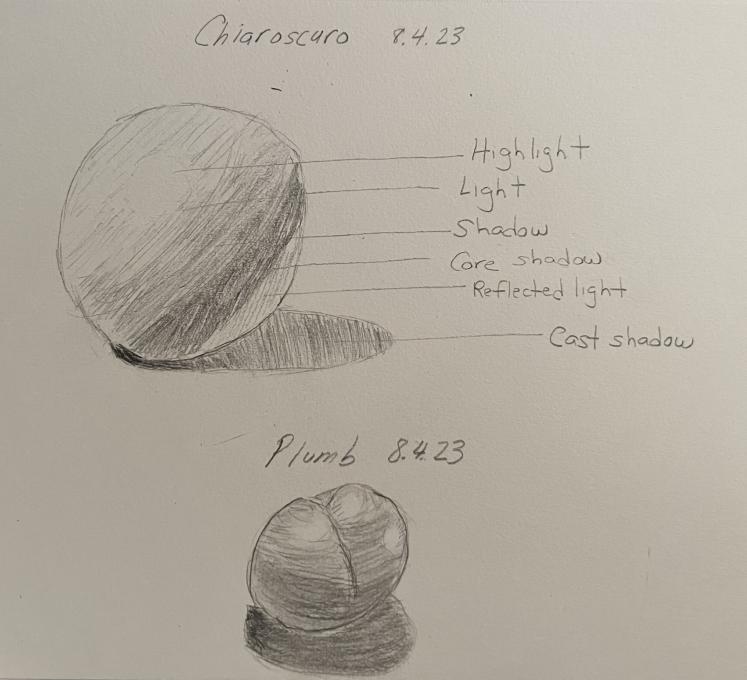 I am a newbie, so this is my first time trying this technique. I plan to try this technique a few more times before moving on.
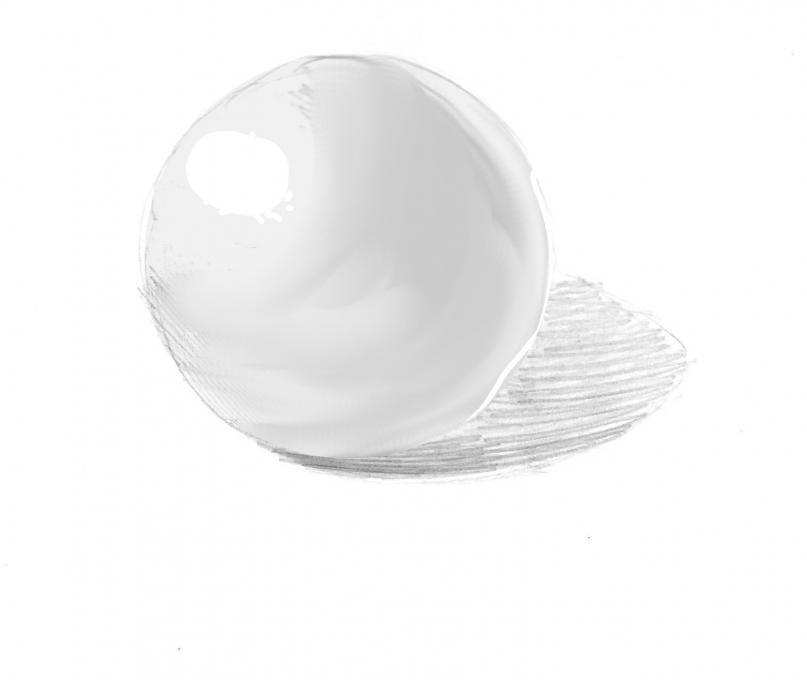
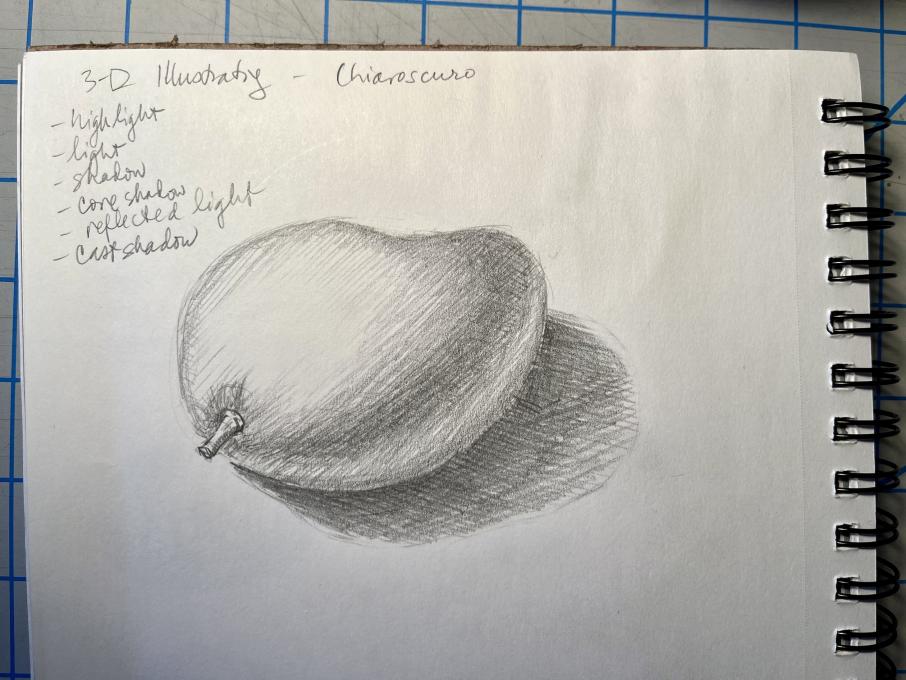 Was fun looking for the various parts of the chiaroscuro. I was curious that my mango had another band of shadow below the reflected light - I think it might have been reflected off the darkest cast shadow? I was glad for the freedom to experiment with the different types of marks - sometimes the hatching was enough, but I found myself cross-hatching and scribbling too. I appreciate others' comments on the difficulty of finding the chiaroscuro in a highly textured object!
 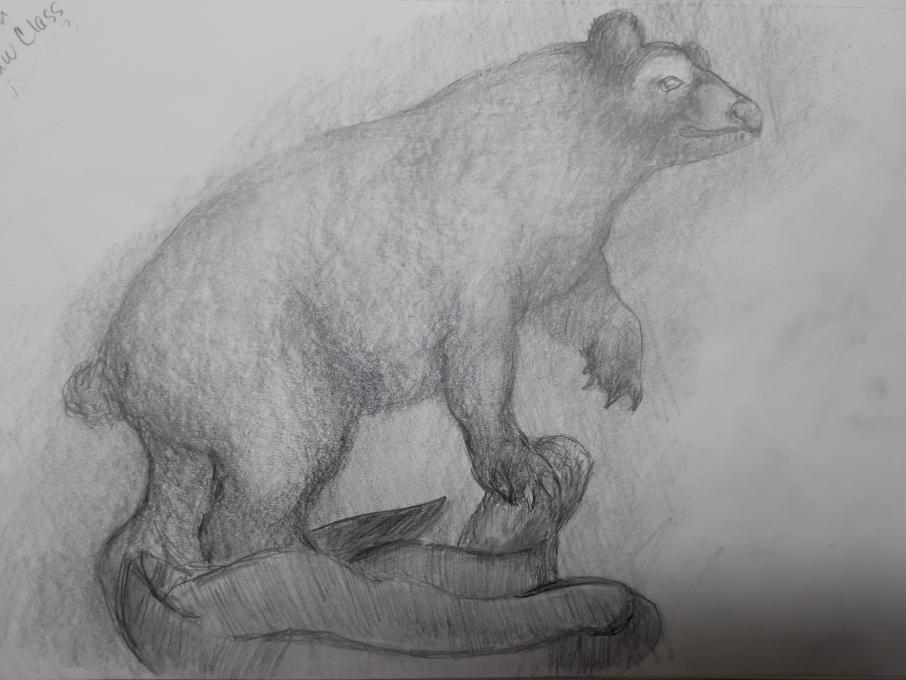 I did not care for my former attempts at creating three d. I am blaming it on the 10.5 inches of snow. I went to the Audubon center that is near and sketched the bear. Hope this is better.
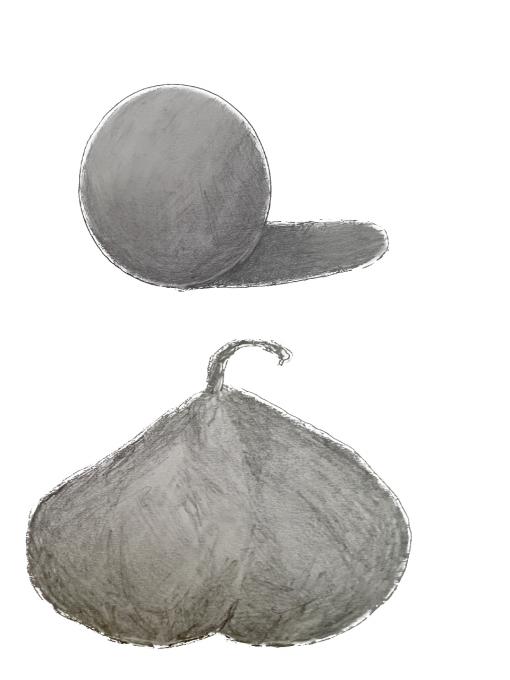
 I remember this being hard in my high school art classes, and it certainly hasn't gotten any easier. I feel like it got a little easier with each attempt, although I certainly have a long way to go! I also want to work on my light, sketchy marks -- my tendency is to go too heavy and dark right away.
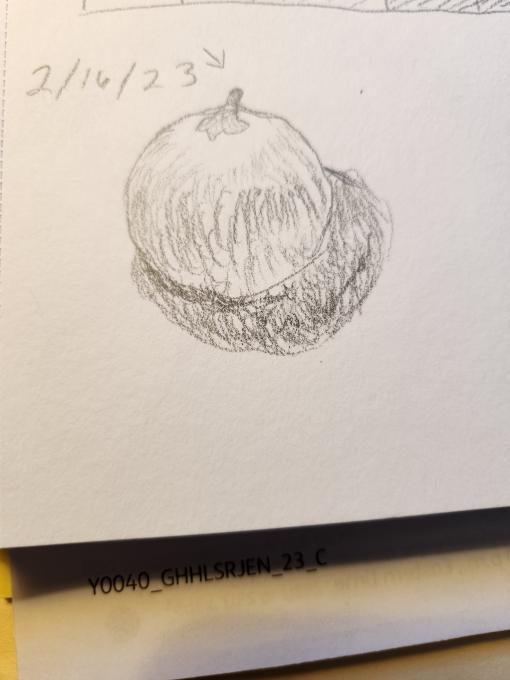

 Very fun...but not very realistic...not a chicken! it is an onion!! ha...I loved learning about Chiaroscuro. I love that kind of information because it helps me to better understand what I'm seeing.
 Read More: